cCloud TV is one of the best IPTV Kodi Addon and it lets you watch a massive collection of live TV shows, programs, sports, movies, news, entertainment, and many more from the live TV channels. The addon is absolutely free to access on Kodi-compatible devices. With cCloud TV, you can also tune in to various radio stations.
cCloud TV Kodi Addon Specifications
| Available on Official Kodi Repository | ✗ |
| Third-Party Repository Name | Kodil Repository |
| Working Source URL | https://github.com/kodil/kodil/tree/master/repo/repository.kodil |
| Trakt Support | ✗ |
| Real Debrid Support | ✗ |
| Subtitles Support | ✗ |
Key Features of cCloud TV Kodi Add-On
| No registration or Sign up required | Stream videos in eight different languages |
| It has a User-friendly interface | It also offers on-demand content from cable TV |
cCloud TV Addon Supported Devices
The cCloud TV Add-On is supported by Kodi on many devices and they are listed down.
- Android devices from Google Play Store.
- Windows PC on Microsoft Store
- Mac users install Kodi from its official website
- Amazon Firestick users can get Kodi by sideloading it with ES File Explorer or Downloader.
How to Install cCloud TV Add-Ons
Follow the step-by-step guidelines to install the cCloud TV Add-on on your Kodi-supported device to stream the on-demand content.
Enable Unknown Sources on Kodi
[1]. On your device, launch the Kodi app.
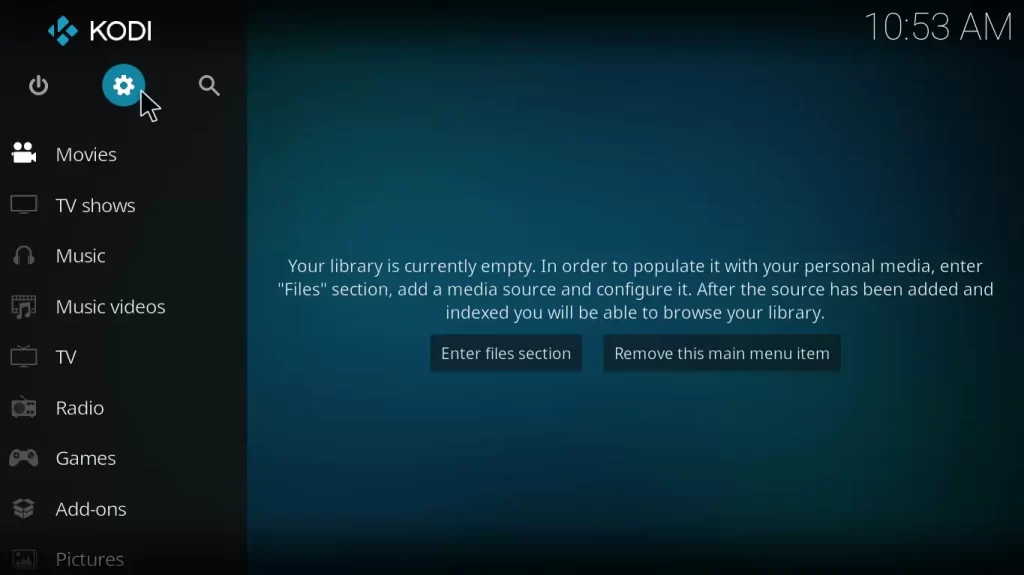
[2]. On the top left corner, click on the Settings icon.
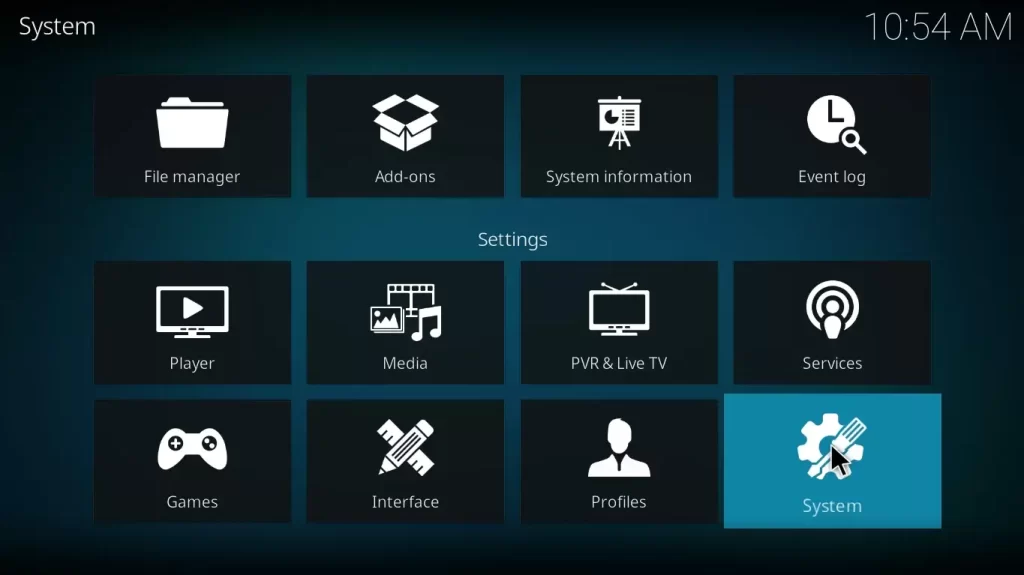
[3]. Next, Select the System tile from the menu list.
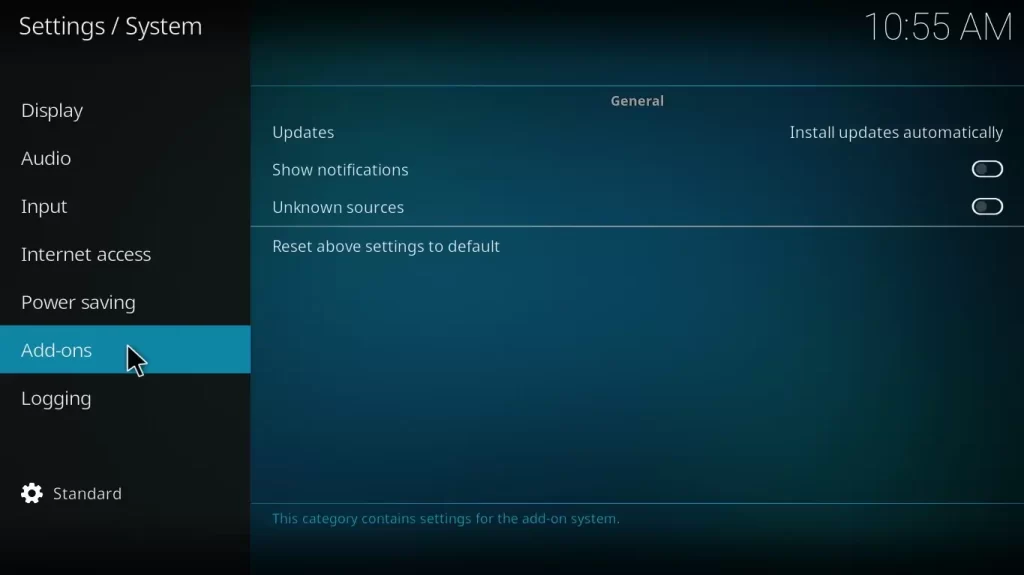
[4]. Under the Settings/System page, choose the Add-ons option on the left side panel.
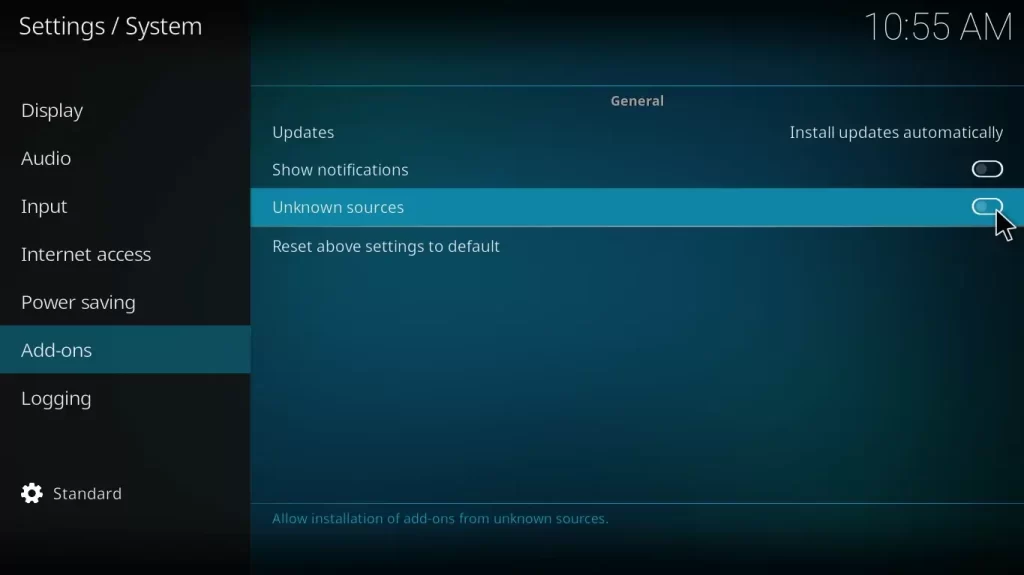
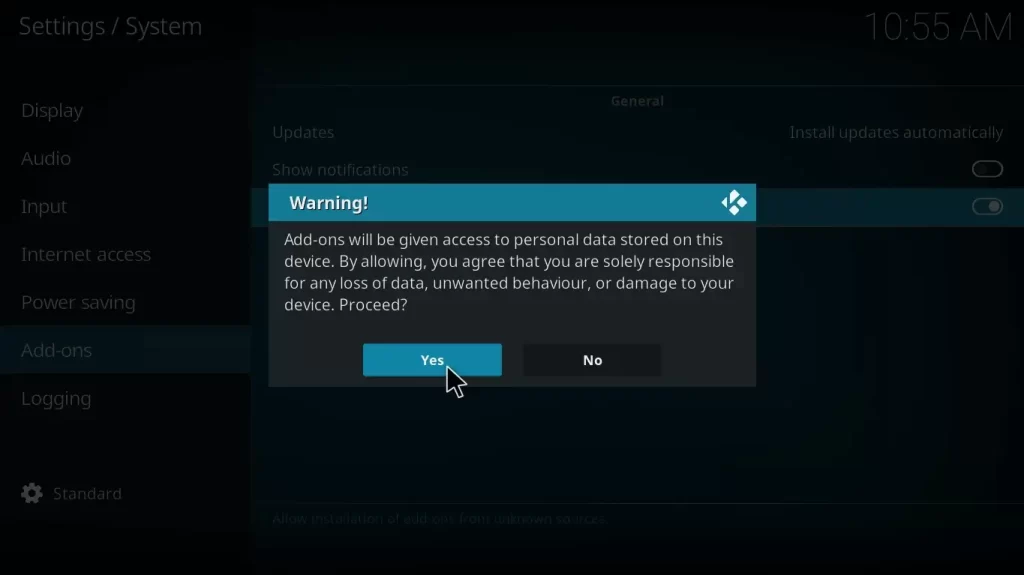
[5]. Toggle the switch to the on position next to the Unknown Sources option on the right.
[6]. Click Yes on the Warning pop-up dialog box.
Install the cCloud Repository
[1]. Navigate to the Kodi app and select the Settings gear icon on the home screen.
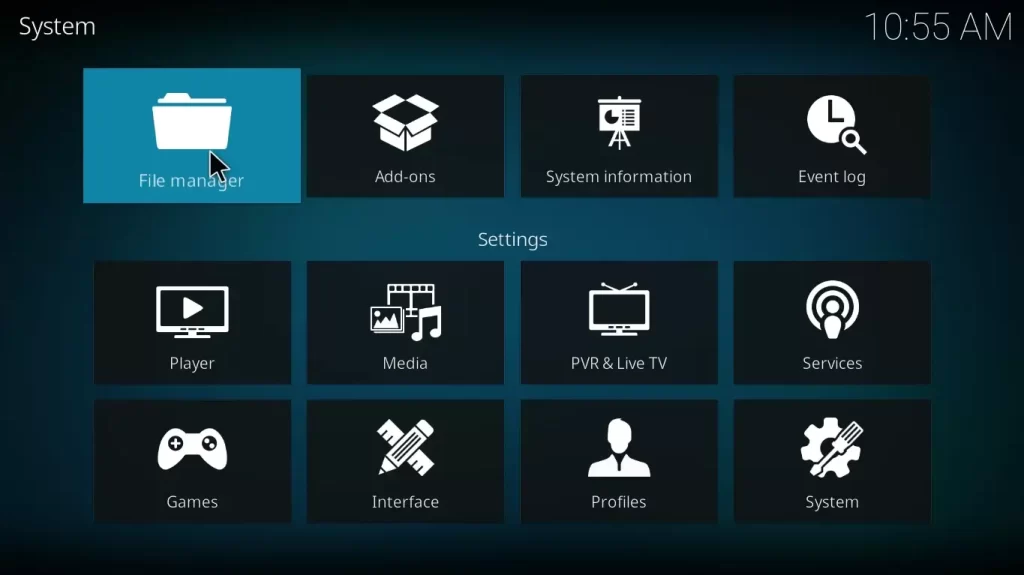
[2]. Click on the File Manager tile.
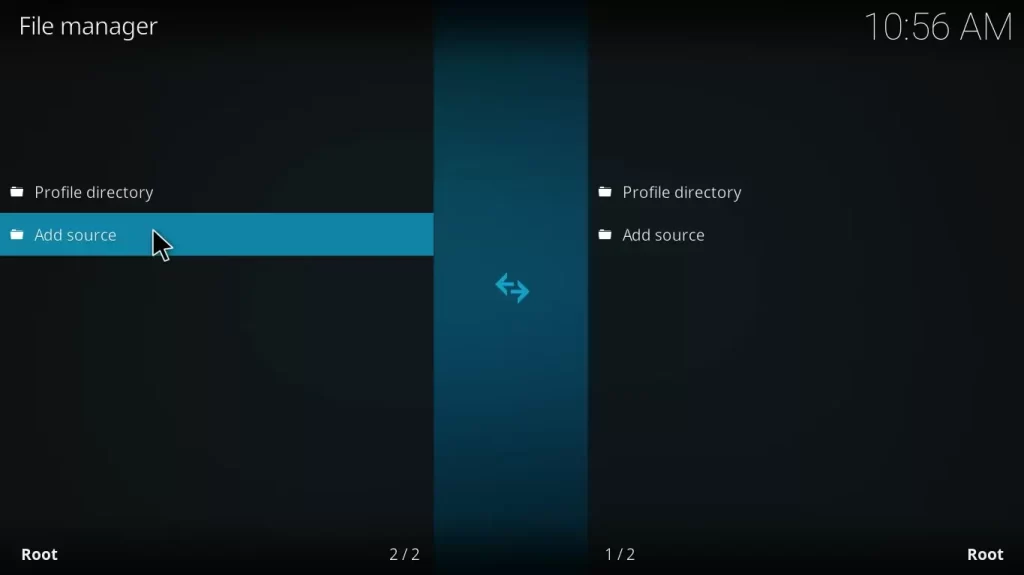
[3]. Under the File Manager page, select Add Source option.
[4]. Type the cCloud add-on’s URL in the <None> field and then click the OK button.
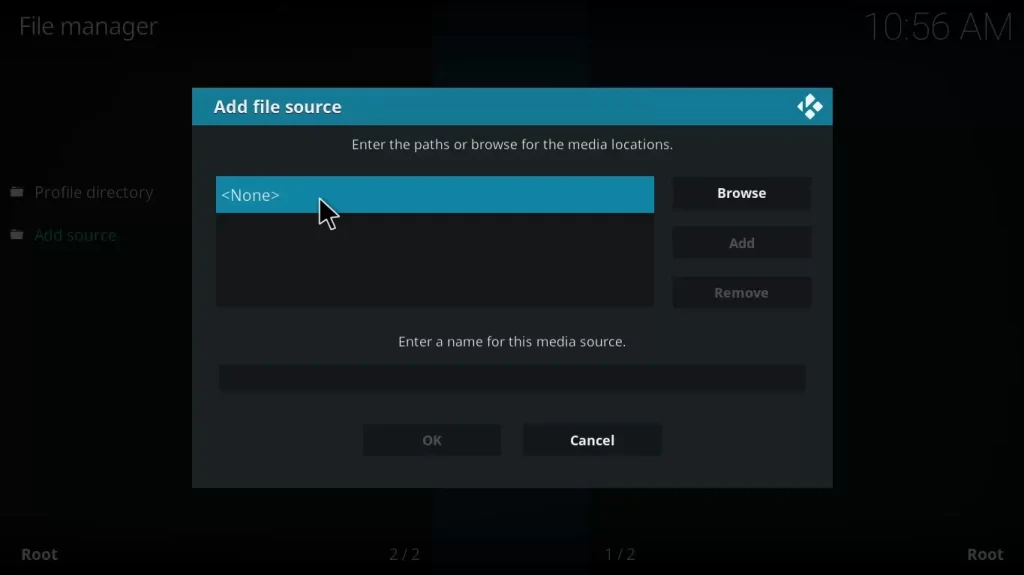
[5]. Enter your file name, “cCloud,” and click the Ok button to save the changes.
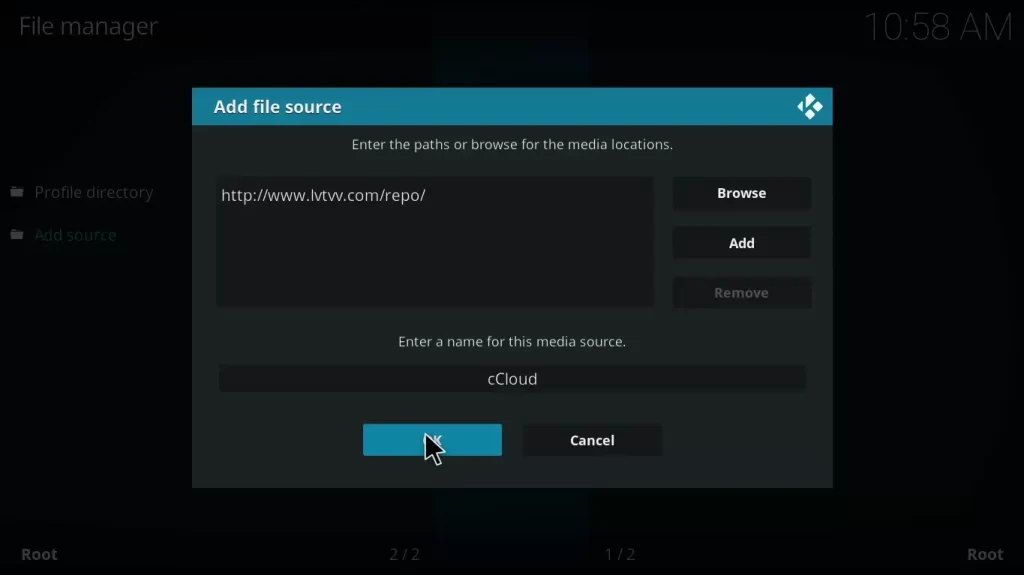
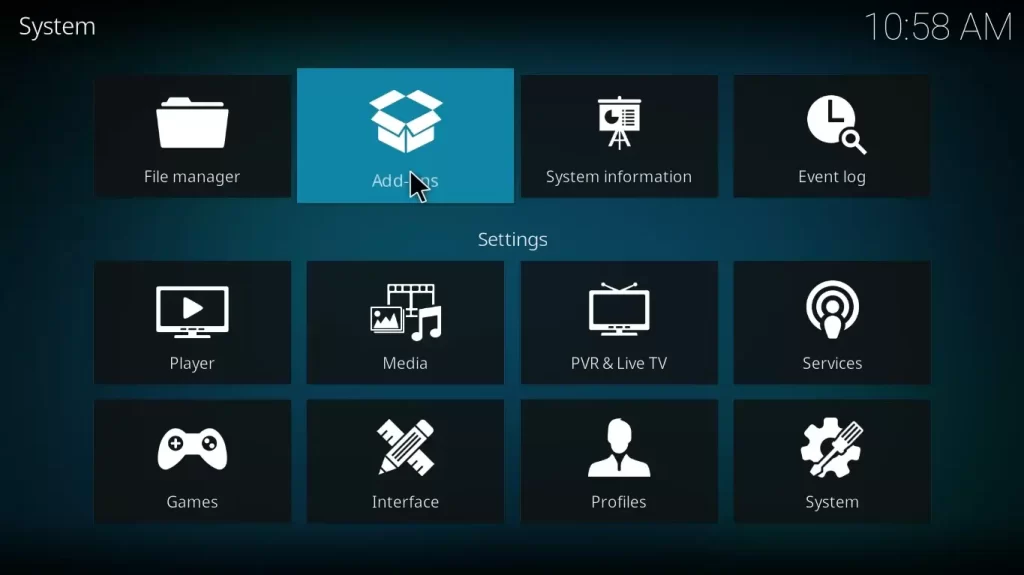
[6]. After that, go back to the home screen of Kodi and click on the Settings icon > Add Ons.
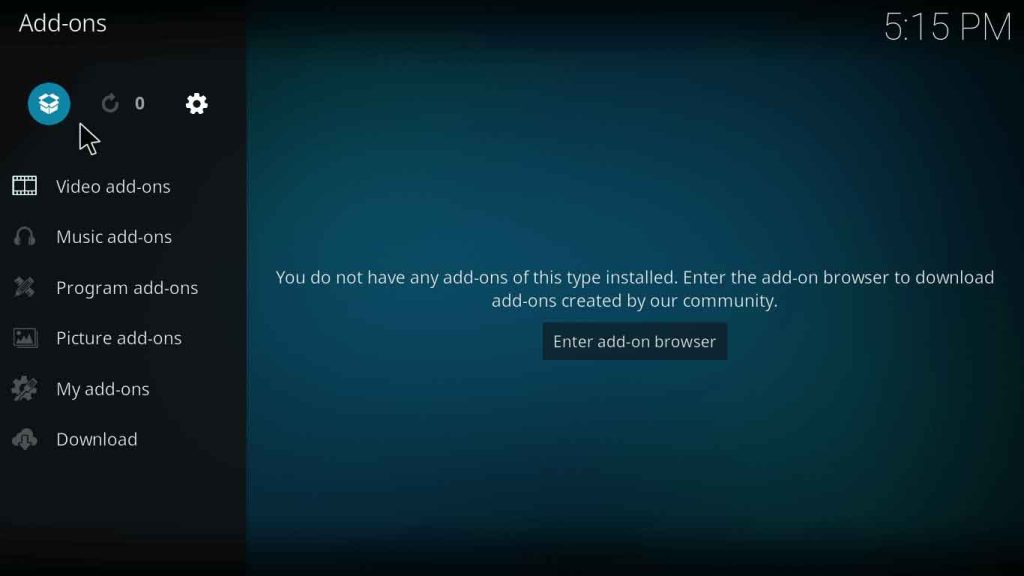
[7]. At the top left corner, select the Package Installer icon.
[8]. Next, select the Install from zip file option.
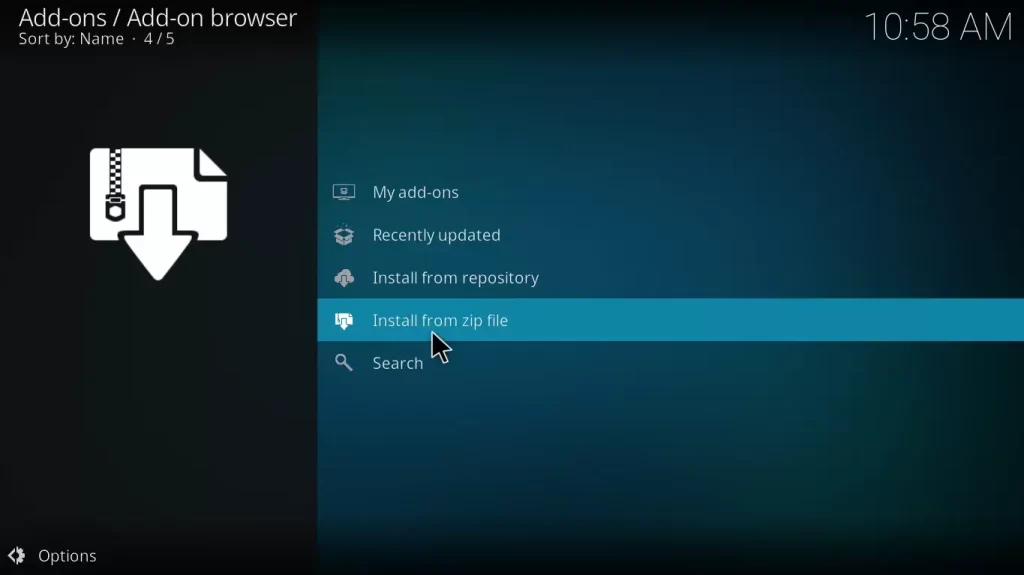
[9]. Select your folder “cCloud” from the list of available sources.
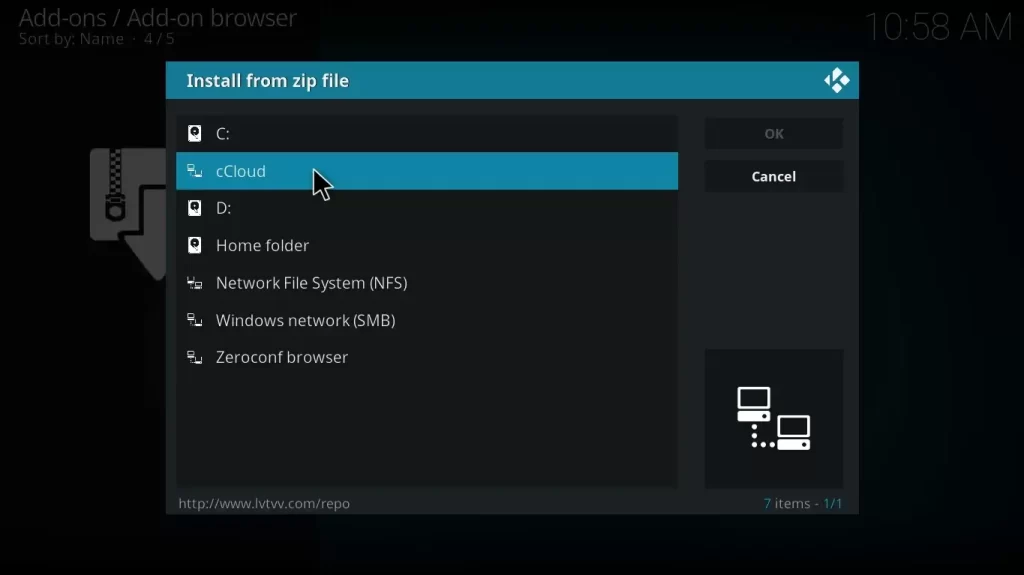
[10]. Once you have selected your zip file, click the OK button on the right-side panel.
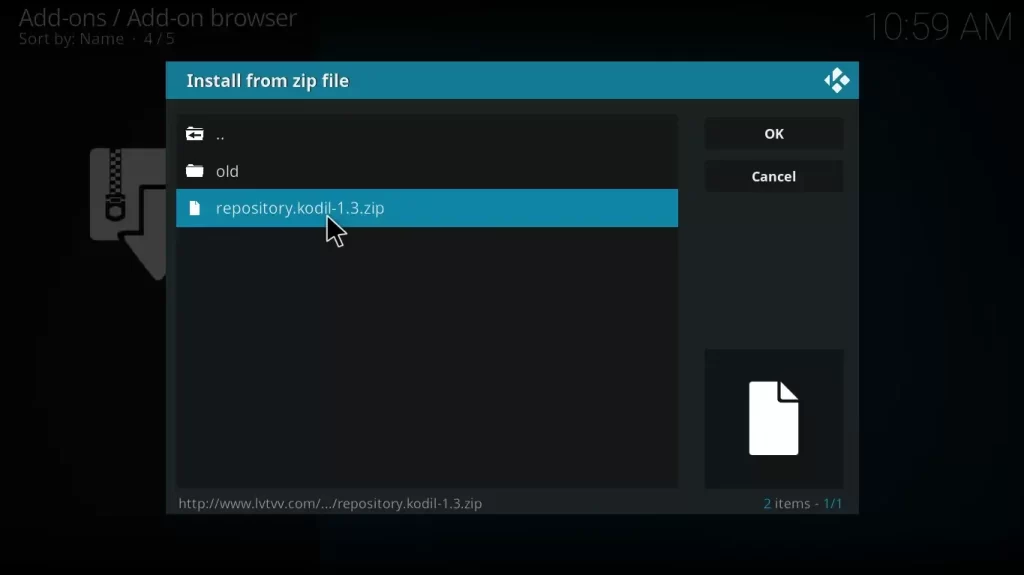
[11]. The Kodil Repository Installed message will appear on the screen.
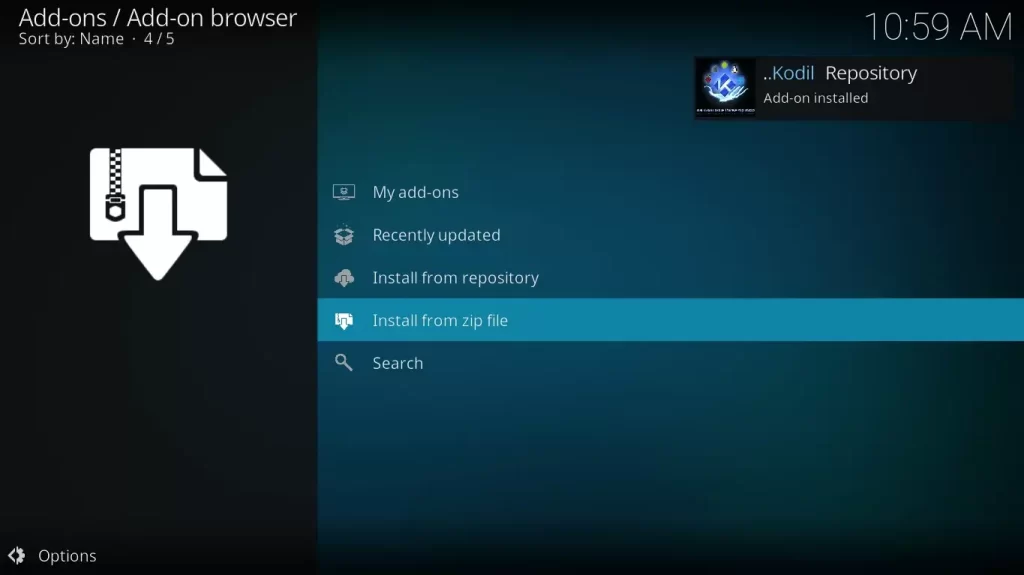
[12]. Click the Install from repository option.
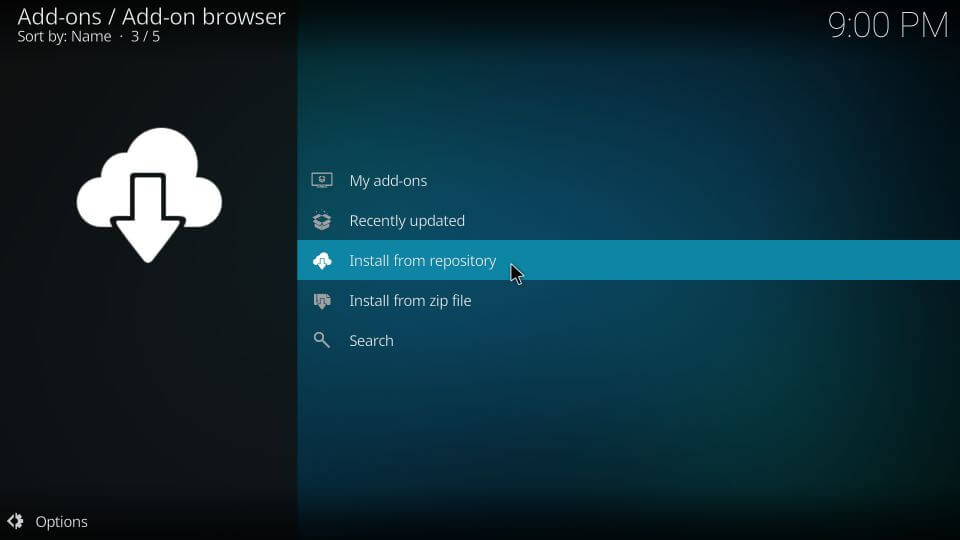
[13]. Then select Kodil Repo > Video add-ons option.
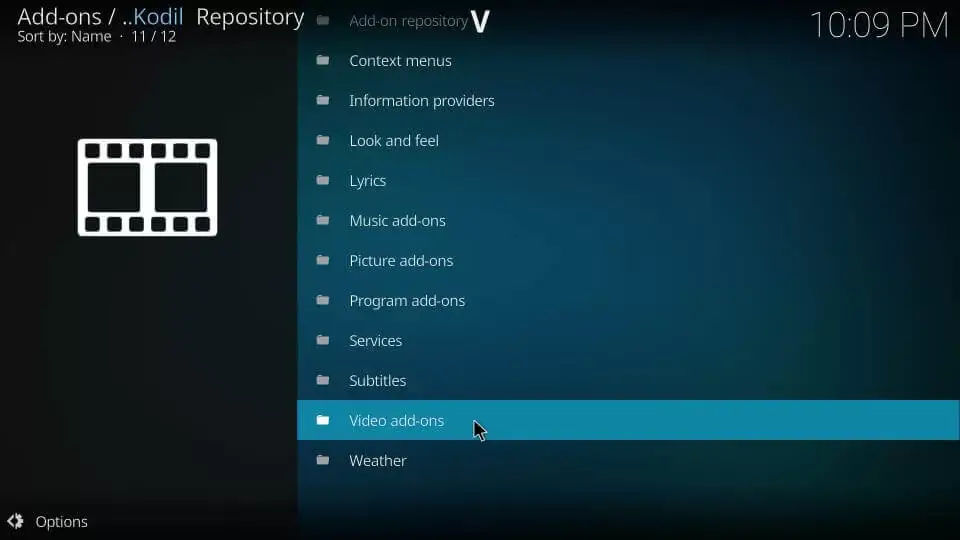
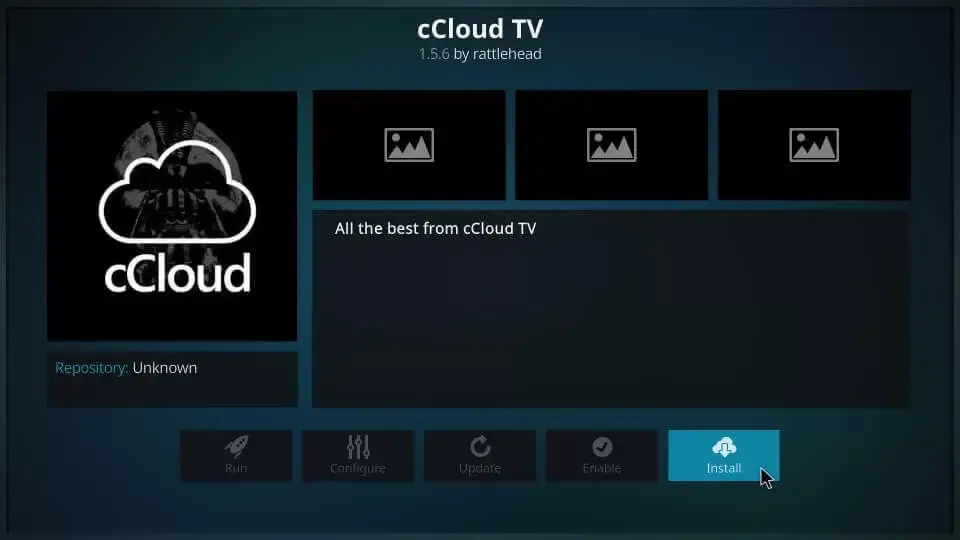
[13]. Choose cCloud from the list and click the Install button to download it on your device.
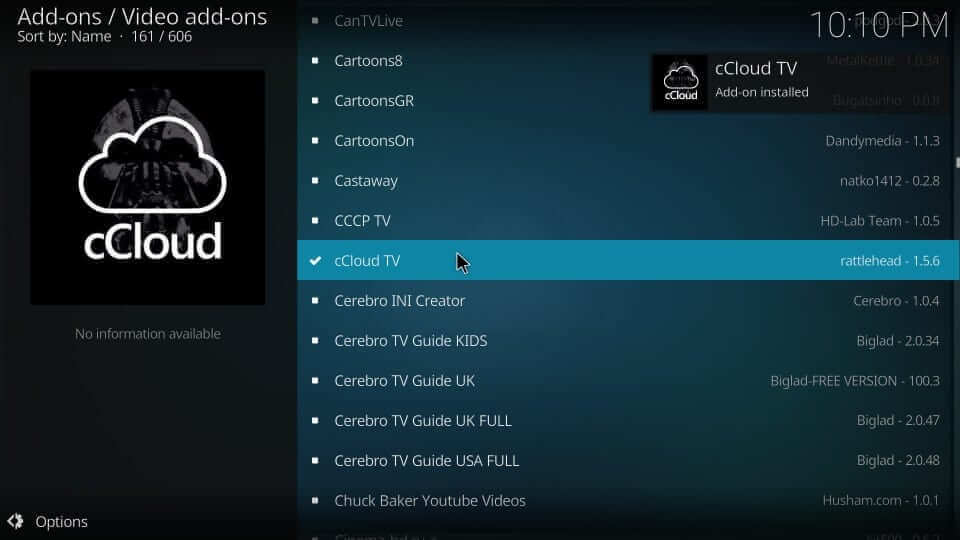
That’s it. After installing the add-on, you will see the message “cCloud Add-Ons is installed” in the top right corner.
cCloud TV Add-On Usage
Once the installation process is completed, you can access cCloud’s on-demand content and channels in HD quality. Follow the steps given below to do so.
[1]. On your device, open the Kodi app and launch the home screen.
[2]. Select Add-Ons from the left menu and choose the Video addons option.
[3]. Under the video add-ons section, select cCloud TV.
[4]. cCloud TV’s home page will appear on the screen.
[5]. Select your desired category and enjoy streaming your favorite titles on your Kodi-supported device.
Our Review
In our opinion, the cCloud TV addon is easy and simple to use on various devices. It allows users to stream hundreds of live TV channels. This add-on is available in many countries, including the United States, the United Kingdom, other European countries & their territories, and Asian regions. cCloud TV is available at many third-party repositories. Alternatively, you can also check out The Crew Addon, Stallion IPTV, and Freedom IPTV Addon.
Frequently Asked Question
To install the cCloud TV addon, you can use cCloud Repo [repository.ccloud.v1.0.zip]. Instead of Kodil Repo, you can use cCloud Repo.